Posts Tagged :

react

Create a React Native Web, Android, and IOS project with Expo CLI 1024 635 mezo

Create a React Native Web, Android, and IOS project with Expo CLI

Hello fellow programmer padawans

As you can understand from the title I will tell you how to create a web, Android, and IOS project with React Native and Expo. First, we need the Expo CLI package.

What’s Expo CLI?

Expo CLI is the npm package that creates a project that we can test on our devices. We won’t need to write codes on Xcode or Android Studio. We only need Visual Studio Code and we can write codes for 3 different environments.

First things first, we need NodeJs installed on our computer if you don’t have it you can download it here: https://nodejs.org/en/.

Install Expo and Create Project

To install the Expo CLI you need to open Node.js Command Prompt and run this code

npm install -g expo-cli

To create the project run this code below

expo init ProjectName

Template Selection

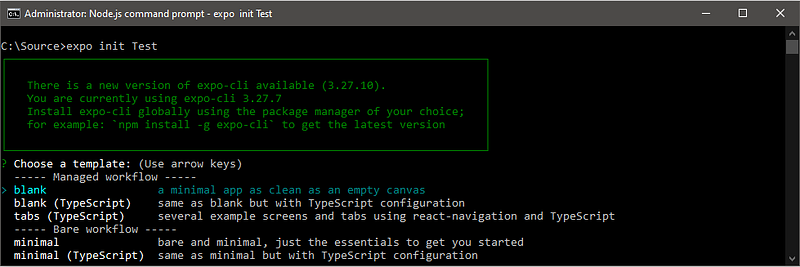
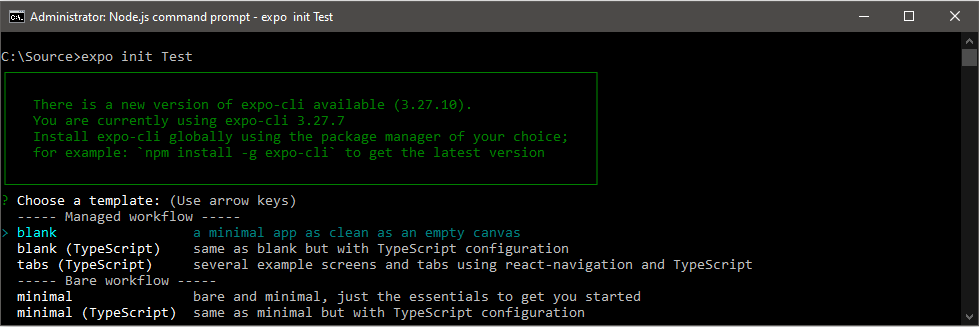
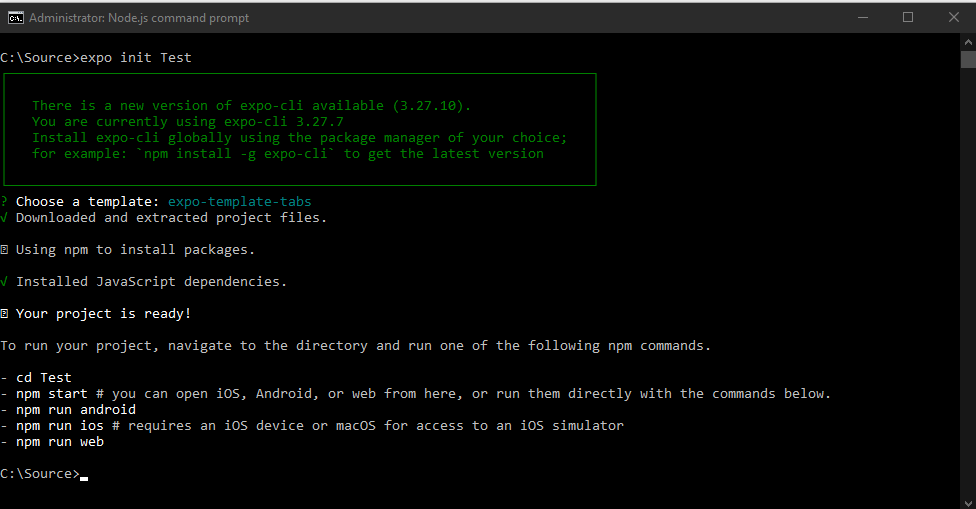
As soon as you make the code creation command run, you will see the selection menu as shown below. We need to select a template depending on our needs. I prefer to select a TABS template, it’s a TypeScript and a very good sample to learn and to see the structure of the project.
Start your project and see your app on your device

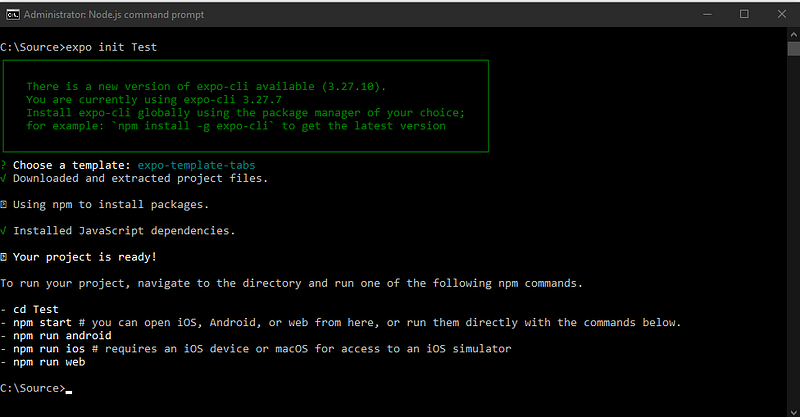
After the project creation is over we need to go inside the project folder from Nodejs Command Prompt to start your project.

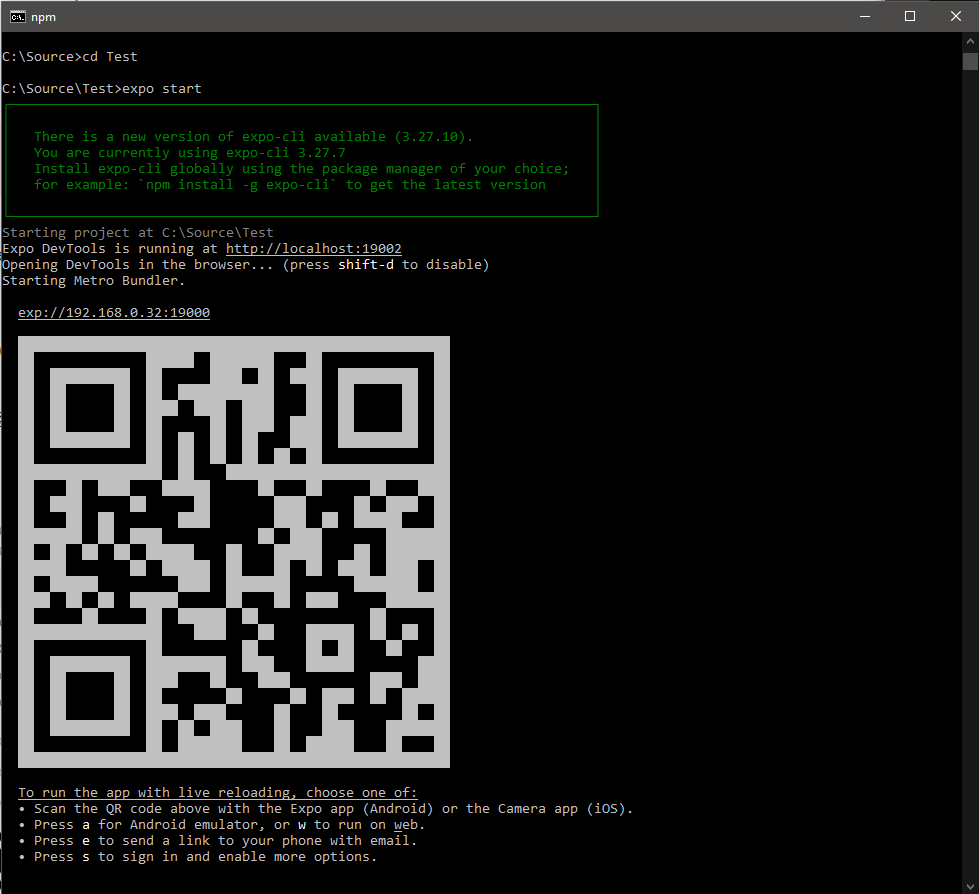
expo start

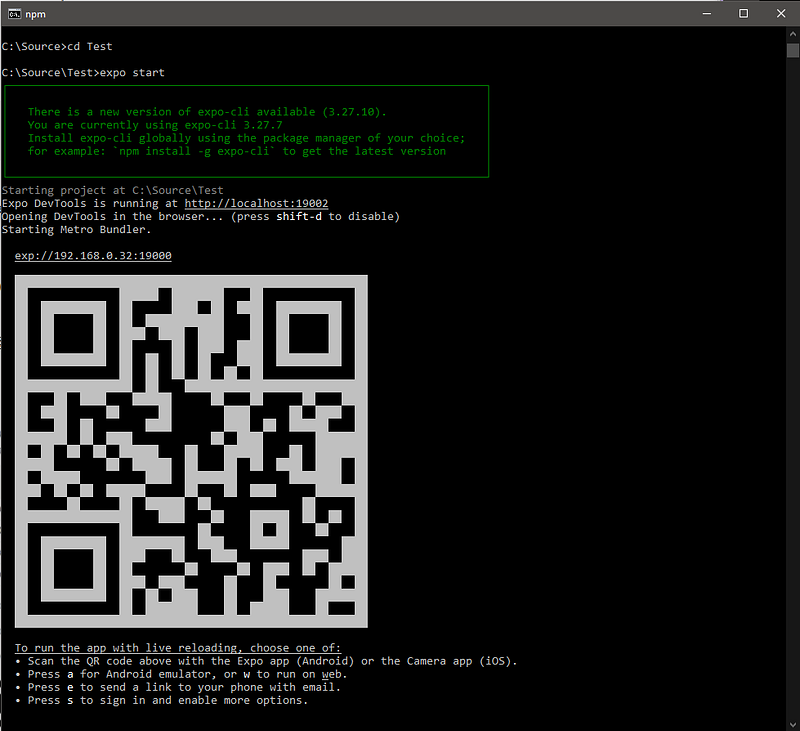
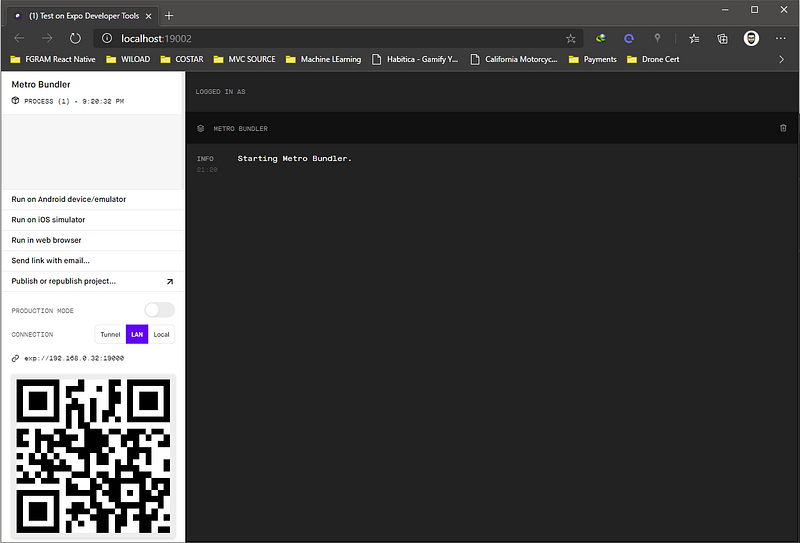
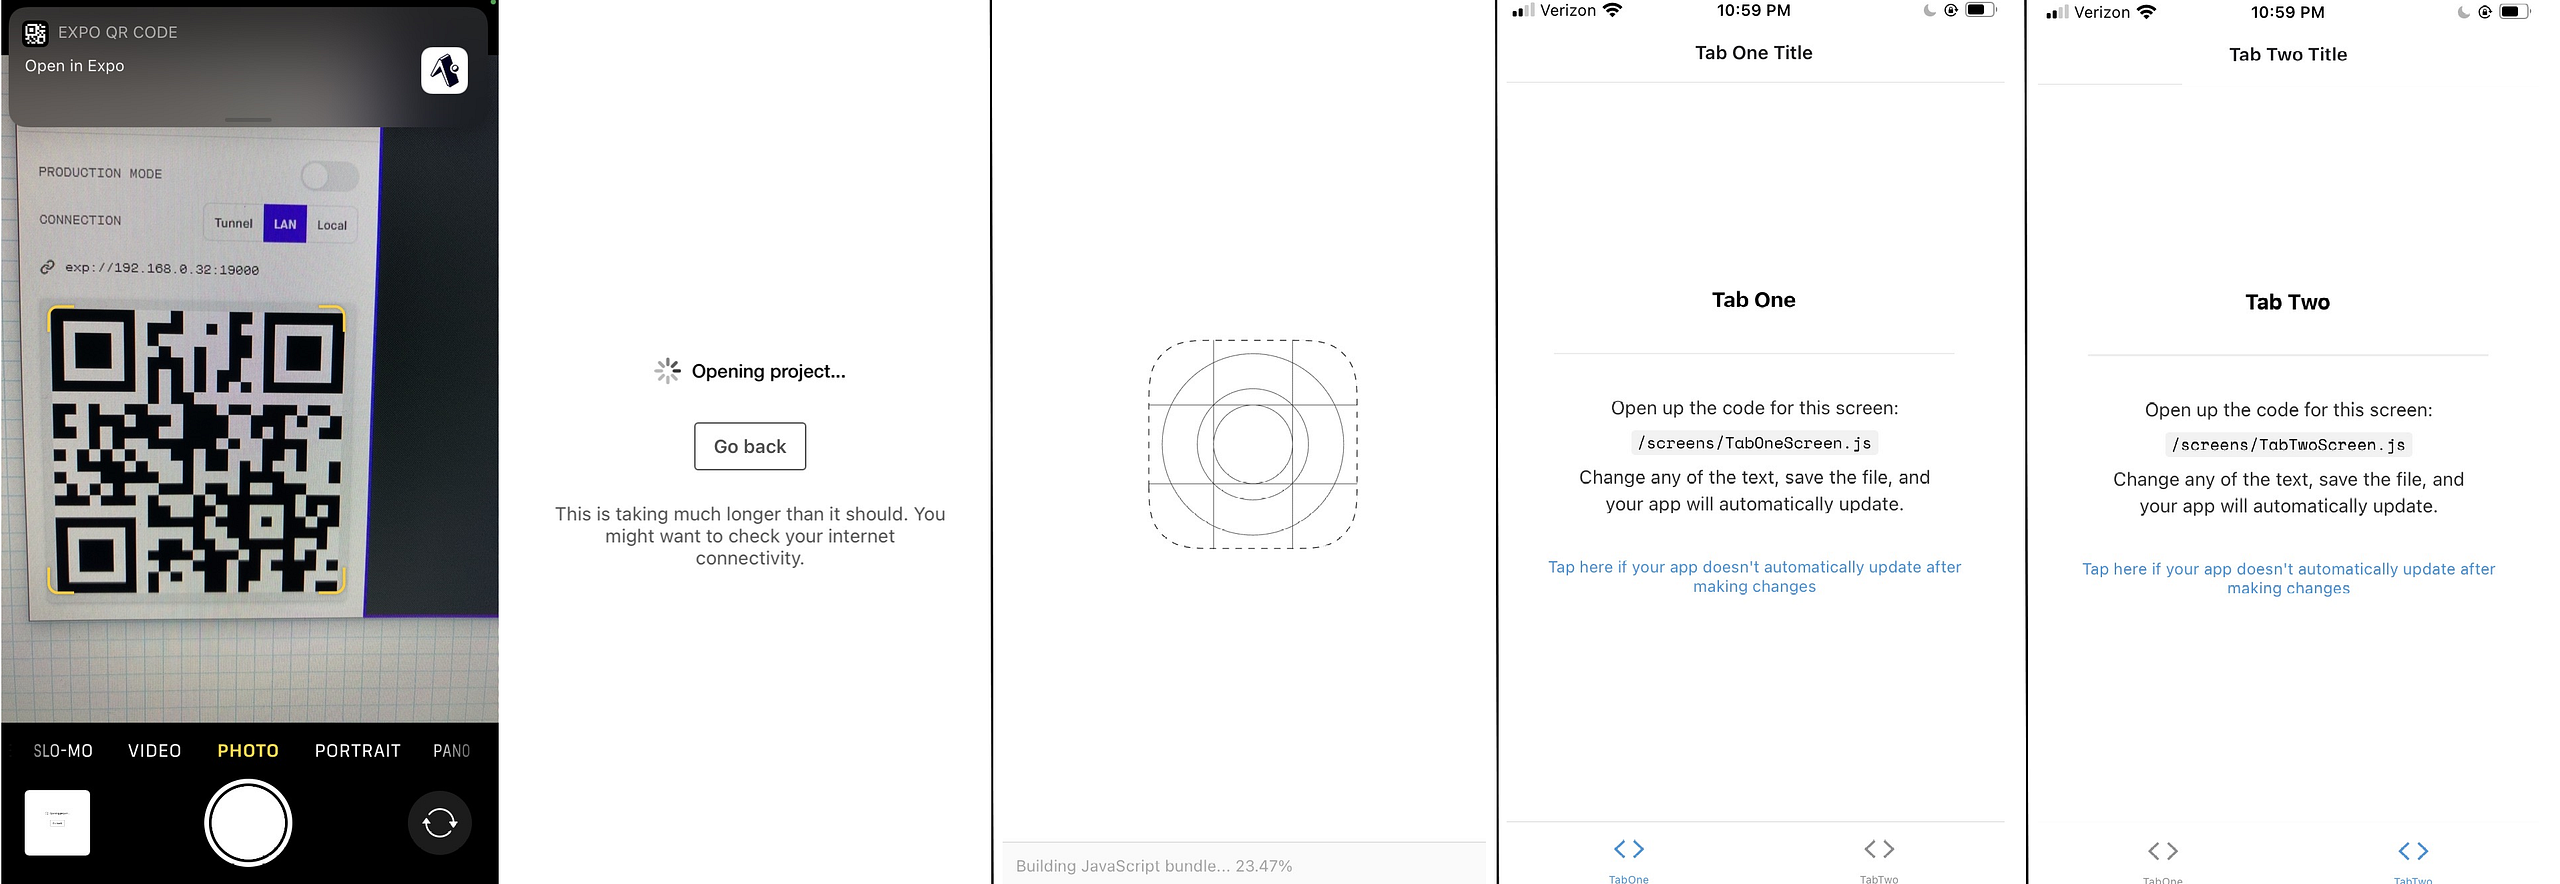
Then we can see a website and a barcode on the command prompt, that barcode is the magic. I will show you…
After you see all these screens you now are ready to test your app on your device. Download the Expo app from the Apple App Store or Google Play and create an account.

Open your Camera and read the barcode. It will then ask you to open in the Expo app, do it and Voila! Your app is working on your phone or tablet.

First, open the project folder with Visual Studio Code so you can checkout the folder and file structure. Then you can find the Screens folder and make some changes on the TabScreenOne.tsx or TabScreenTwo.tsx files and you will see your app is changing on your device as well.

That’s all for now! I will write about components on React Native on my next post.

Thanks for reading

May the force be with you. 
Expo ile React Native Web, IOS ve Android Projesi Oluşturmak 1024 635 mezo

Expo ile React Native Web, IOS ve Android Projesi Oluşturmak

Selamlar sevgili programcı padavanlar

Başlıktan da anladığınız gibi bu makalemde sizlere nasıl React Native ile hem web hem android hem de IOS projesi oluşturabiliriz sorusunun cevabını anlatacağım. İlk olarak Expo CLI paketini yükleyerek başlıyoruz.

Expo CLI paketi ile oluşturduğumuz projemiz için XCode yada Android Studio gibi ek IDE yazılımlarına ihtiyaç kalmadan tek seferde 3 platform için yazılım geliştirebilmemizi sağlıyor.

Expo ile proje geliştirebilmek için öncelikle NodeJS e ihtiyacımız var. Eğer bilgisayarınız da NodeJS yoksa şuradan https://nodejs.org/en/ indirebilirsiniz.

NodeJS i kurduk şimdi sıra Expo CLI paketinde.

Expo Kurulumu ve Proje Oluşturma

ExpoCLI kurmak için Node.js command promptu bulup çalıştırın ve aşağıdaki komut satırını çalıştırın.

npm install -g expo-cli

Projeyi Oluşturmak için ise :

expo init ProjeAdı

Template Seçimi

Komut satırı çalışır çalışmaz aşağıdaki template seçim ekranı bizi karşılıyor. Buradan projenize uygun olan şablonu seçebilirsiniz ben TABS template ini seçiyorum. TABS ile gelen proje içerisinde çalışan bir sekme örneği var React Native i çok iyi anlayabileceğiniz güzel bir örnek olduğunu düşünüyorum.

Sonrasında yine Node.js command prompt üzerinden oluşturduğumuz klasörün içine giderek projemizi çalıştırıyoruz.

expo start

Proje çalışırken hem command prompt üzerinde hemde açılan localhost web sitesi üzerinde bir kare barcod çıkıyor bu barcod ne işe yarıyor birazdan anlatacağım…

Nodejs Command Prompt

Web Expo Proje Sayfası 

Projemizi Cihazlarda Çalıştırmak

Ardından elinizdeki cihaz üzerinde Google Play yada Apple App Store üzerinden Expo uygulamasını indirerek bir hesap oluşturun ardından projenizi eklemek için bir barkod isteyecek işte şimdi yukarda çıkan barkodların bir anlamı oldu. Cihazınızın kamerası ile barkodu okutun ve oluşturduğunuz uygulamanız telefonunuzda çalışmaya başlasın.

Başlangıç olarak projenizi Visual Studio Code üzerinde açıp Screens klasörü içindeki TabOneScreen.tsx , TabTwoScreen.tsx dosyalarını biraz değiştirerek uygulamanızı biraz değiştirebilirsiniz.

Şimdilik bu kadar bir sonraki yazıda sizlere React Native üzerinde component yapısını anlatacağım.

Okuduğunuz için teşekkürler

Bilgiyle Kalın…

    Join our Newsletter

    We'll send you newsletters with news, tips & tricks. No spams here.